I should be writing about crop rotation, so why I’m posting on making yogurt instead?
It is a truth universally acknowledged that growing your own affects the way you cook and eat. In my case, it has affected the way I think more broadly, for example about reuse and recycle.
On the plot I reuse a lot of punnets, bags and all sort of food packaging, including yogurt tubs, with which I make seedlings domes. I started using them because – mostly coming in plastic 5 – they were not recyclable in our council scheme, which does only 1 and 2 (plastic bottles, basically). When I reached capacity on the plot, I got very annoyed to have to throw them in the bin.
Then I found that Rachel’s used recyclable pots. Then Rachel’s stopped using recyclable pots, and in any case I was so disappointed they used starch in the flavoured yogurt. Then I found that Woodland’s makes lovely sheep yogurt in recyclable pots. But what if they stopped? I have had enough of unreliable supply of my favourite products – it happens a lot here in the UK: as soon as I find something I like, it disappears from the market.
I thought I would like to make my own, so I asked around and ever resourceful Carl said it would be easy peasy and shared his recipe, with which I had a few mixed results trials. Then I also had a chat with Sonia (another great source of food-related advice), and, in just over a month, I managed to come up with a recipe that worked for me, and I’m not going back to tubs!
 Trial and error is necessary, because results depend on the milk and tools you use.
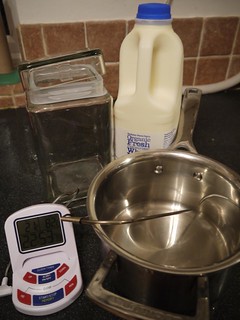
I use non-homogenised, organic milk. If you can find it locally, so much the better. If you can find it in a glass jar, possibly even better.
And I process it with the kit in the picture.
Besides, you need some yogurt as a starter (after the first time, you will reserve a few spoonfuls of the previous batch). I tried several and the one I liked most was Yeo Valley Greek Natural, because it does not contain any funny stuff (“No added ingredients. No added sugar.”) and because it contains
- Lactobacillus bulgaricus;
- Steptococcus thermophilus (the two yogurt bacteria); and
- Bifidobacteria (probiotics)


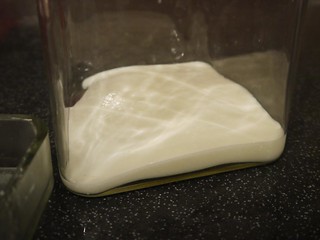


Place in the fridge for a few hours to cool down and settle before eating.
Oh by the way, if it does not work and you do not find it thick,the cause was the temperature not being warm enough for enough time. You can heat it up in the jar to around 50C by placing in the oven (mind any plastic that might melt), and let it cool down inside.
About Me
 M.Paola Andreoni
I got the first allotment in 2007 (in the UK) and started growing my own food for the first time. Learning as I went along was not enough, so I studied some horticulture. I am striving to abide by organic principles. Brexit gave me a new life in the Netherlands, and two new plots by a nature reserve.
Some Rights Reserved

This work is licenced under a Creative Commons Licence.