Monday 29 September 2014

Raspberries in cages

This week I will be working in the fruit garden, where, in preparation for the winter, raspberries (Rubus idaeus) need to freed from the netting cages that protected them for birds in the summer.

Plaiting netting 

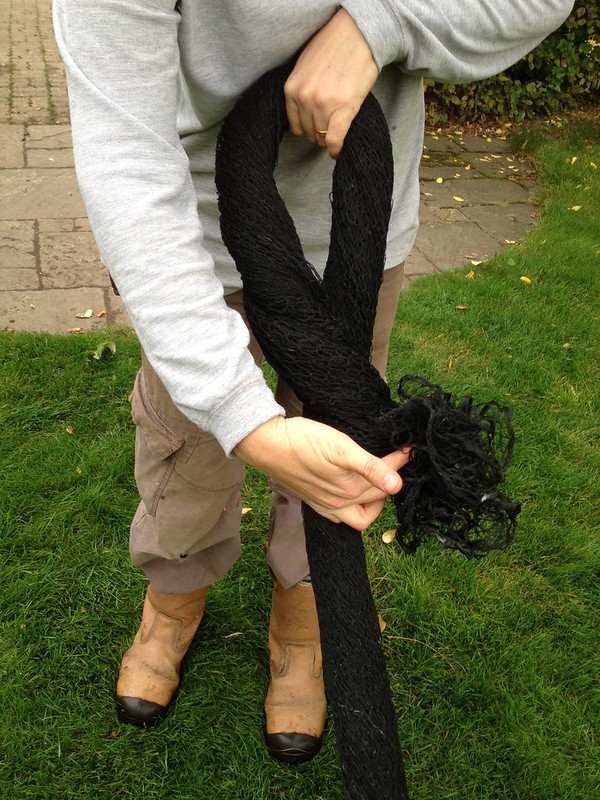
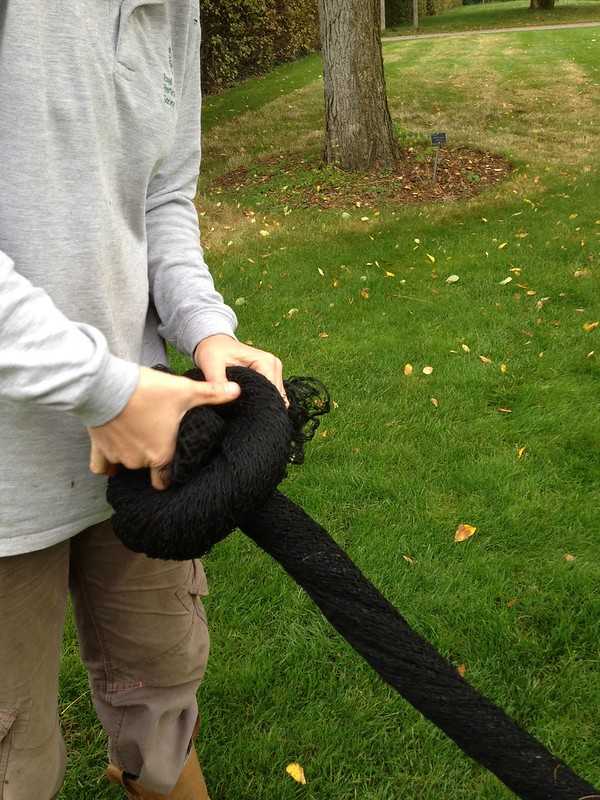
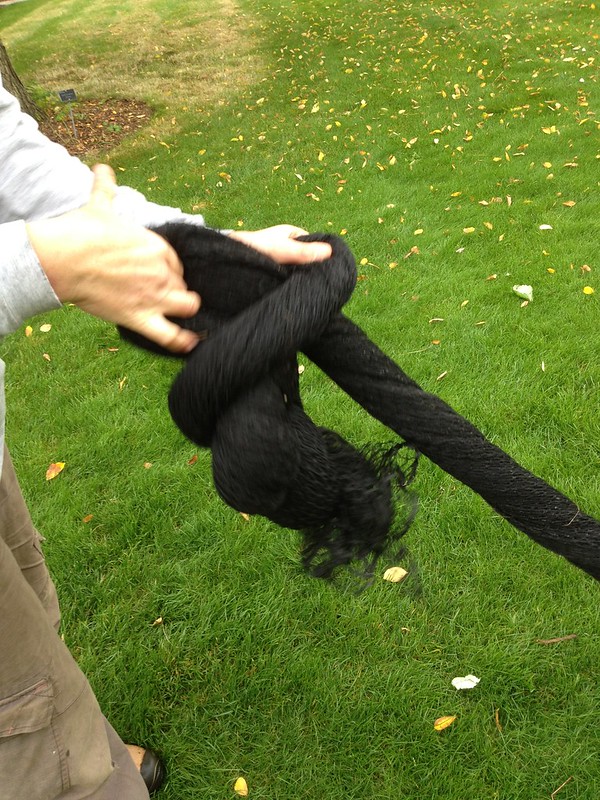
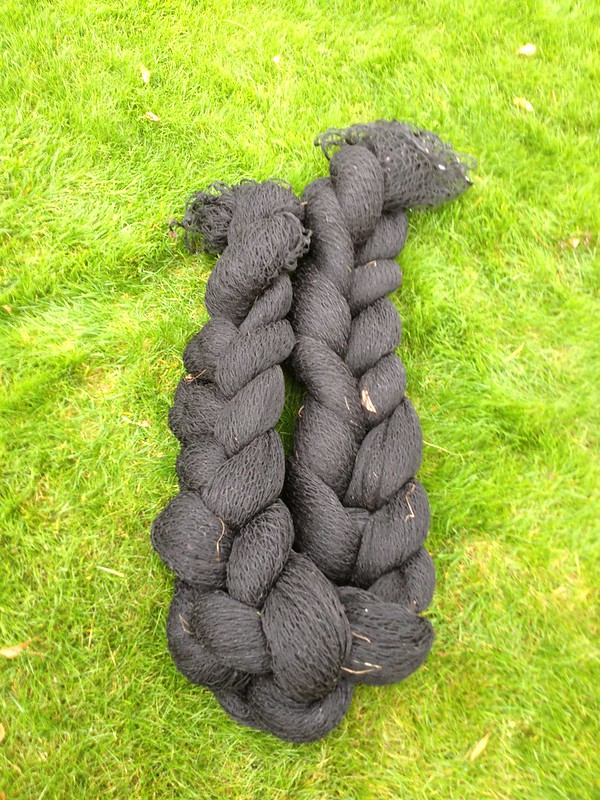
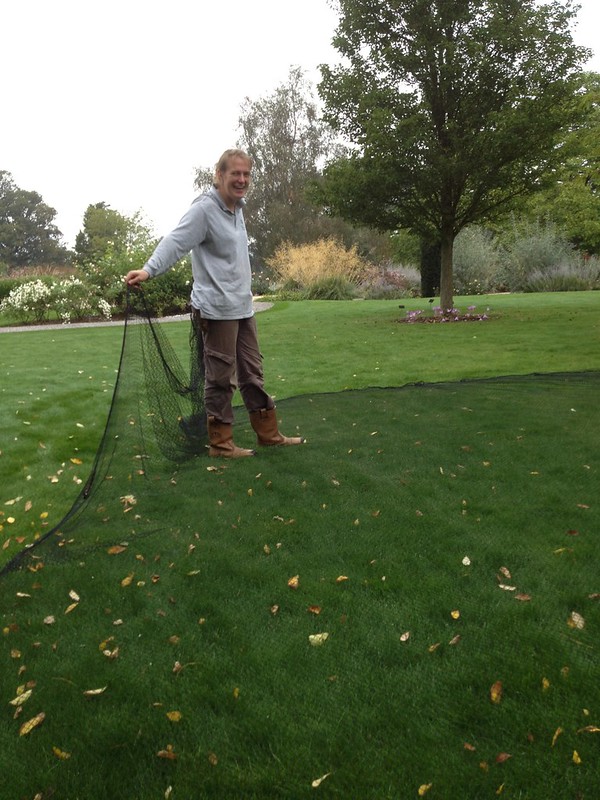
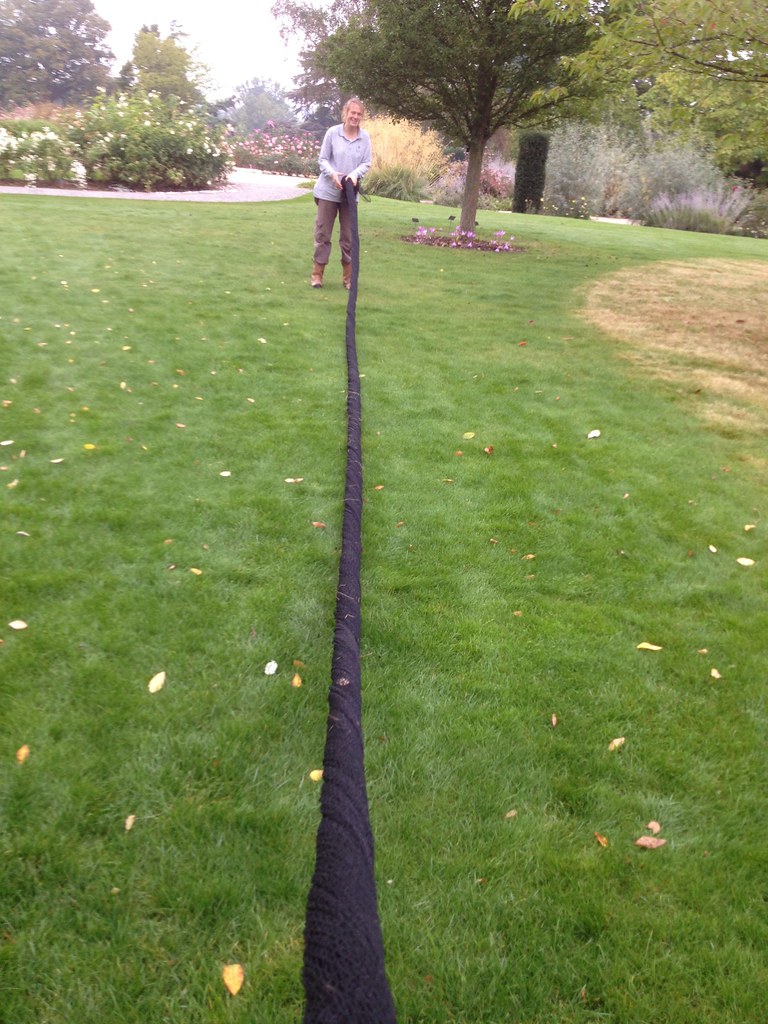
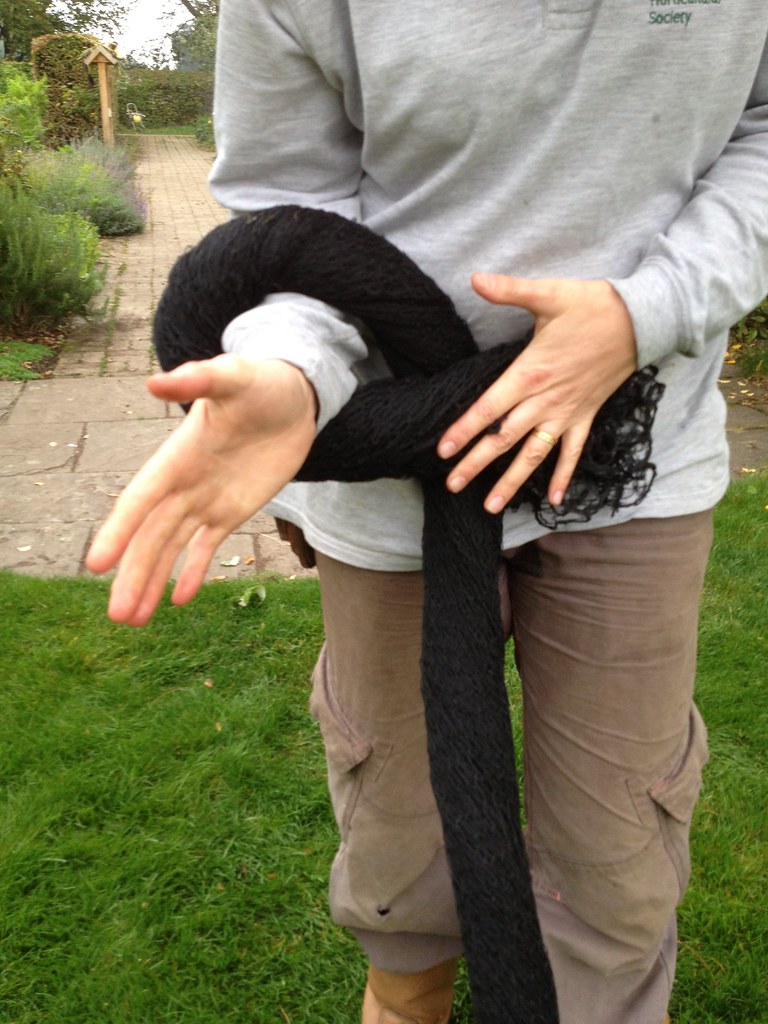
First of all, we removed the side netting, which is stiffer plastic, and we rolled it up. Then we had to deal with the top, knitted netting. We cleaned it of all leaves, then we laid it on the lawn to fold it. Because knitted netting is quite unwieldy, it is tied in a plait to keep it tidy in the shed over winter, and I learnt how to do that this morning.

Rolling up the net...
... to a rope
Plating: loop 1
Plating: loop 1
Plating: loop 2
Plating: loop 2

Plating: further loops
A tidy net, ready for storing


Lacing in summer-fruiting raspberry canes

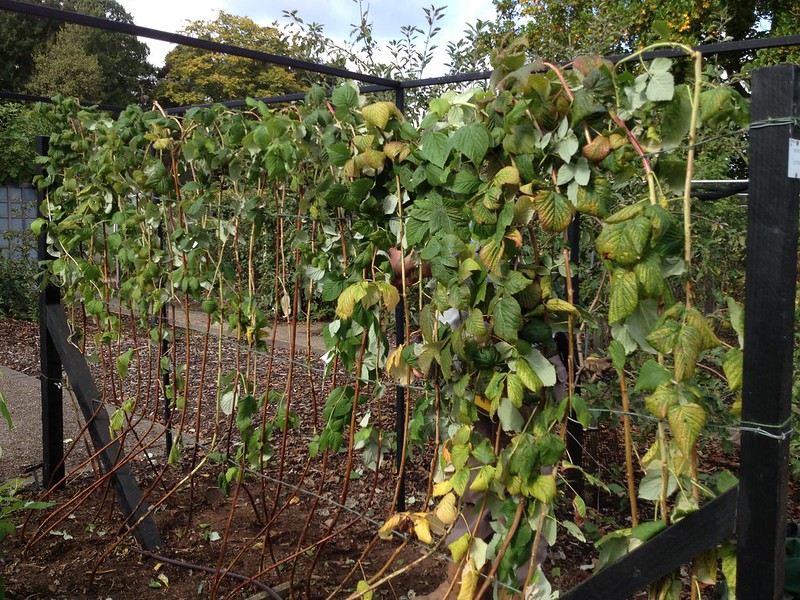
Once the raspberries had been freed of the cage, the summer-fruiting varieties, or floricanes (so called because they put up vegetative growth in the first year and only flower and set fruit in the second, some of which had grown quite tall and through the netting) had to be tidied up. As they are trained along a post-and-wire system, we also proceeded to tie them in for the winter, to prevent wind rock.

Autumn-fruiting varieties do not need such management, as they flower and set fruit on first year's canes (primocanes) and are cut back to the ground at the end of the season. Because of that, they are also trained on a different support: a single fence with parallel wires.

It is quite a frustrating process, to start with, I found, as the canes have a mind of their own, but - having now down some three rows - my technique has improved and consists of the following:

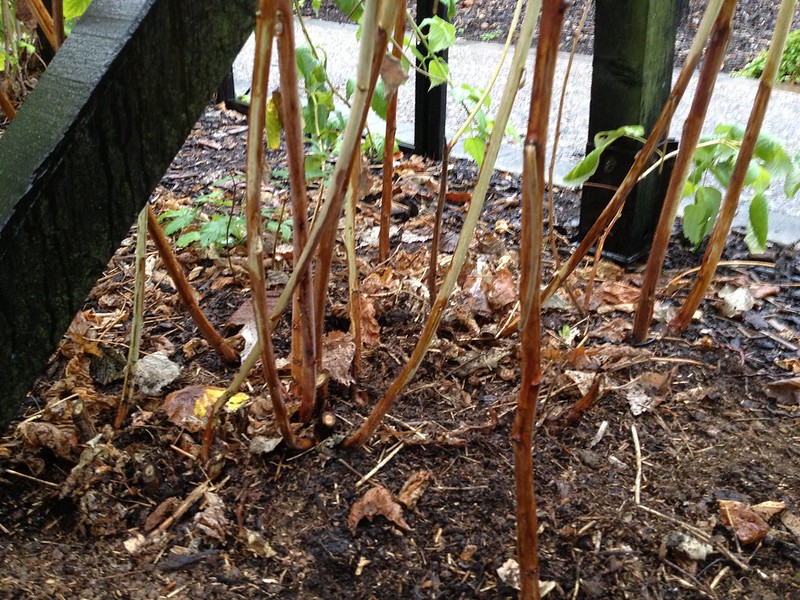
  1. Clean the area around the base of the raspberries from weeds and fallen leaves, so that you can easily identify the best canes to keep; if there are any stumps left from previous canes that were badly pruned, it's best to remove those too
  2. Before clearing the area
    After clearing the area
  3. Remove any fruited canes (the ones that have the remains of fruit stalks and look as they are past their best
  4. We use twine, which needs moving it into tight spaces, so my colleague taught me how to make a sort of weaving shuttle around a short stick (one can use a finger-thick slice of cane that has just been cut); I must say there is still ample room for improvement for me at this stage, as my "shuttle" tends to unroll at some stage of the process, which makes tying more complicated than it should
  5. Tie the twine to one of the post, with a self-tightening knot if possible, but, whichever the knot, making sure it is not going to loosen up over time. We have three wires in our system: at the bottom, middle and top of the canes, and we start tying canes to the lower one. Before starting, we tie a self-tightening knot at the beginning of the wire (this step is mirrored at the end of the wire)
  6. Choose the first cane to tie in: it has to be strong, higher than the top wire and be stiffer with secondary growth (avoiding green, sappy canes); it is better if it is not damaged, but one has to do with what one sees in front of them
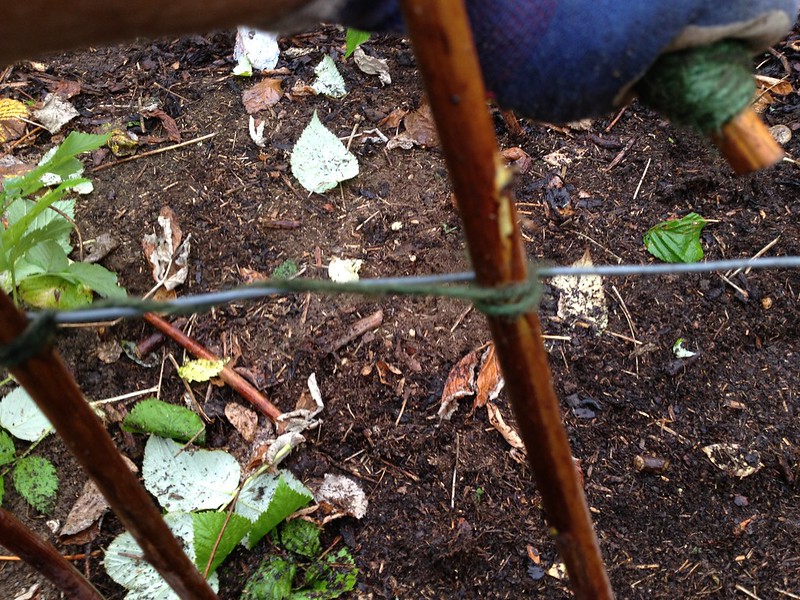
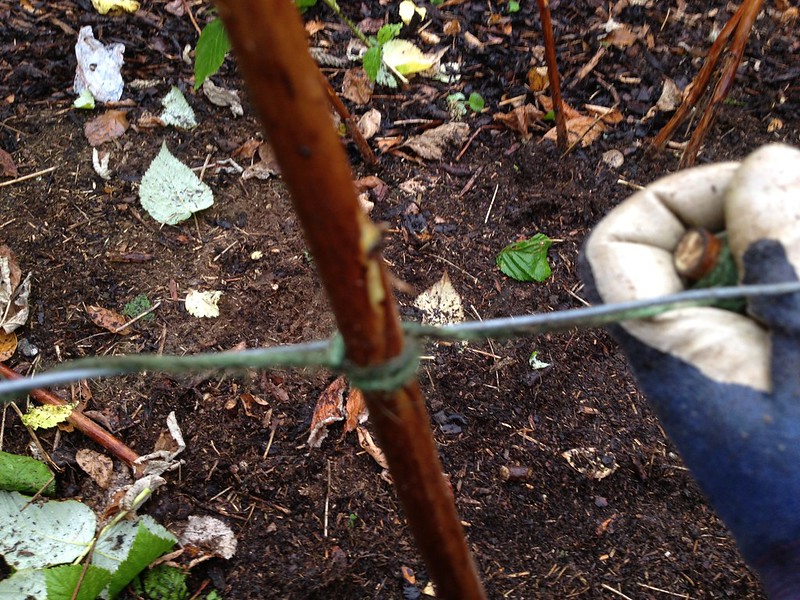
  7. Tie in the first cane (see pictures below), then proceed to the next one that needs to be tied in at about 10 cm distance on the wire. It does not matter which side of the wire the cane comes from, or whether it is actually 10 cm (or so depending on the amount of canes and length of the wire) away from the previous one: canes can be bent to one's needs, provided that there is a rigorous successional sequence and they are not selected randomly.
  8. Any canes that have not been chosen are best trimmed back to the ground as one goes along. As raspberries tend to produce buds straight at the bottom of the canes, it is best to do any pruning right back to the ground, so that stumps do not get in the way of new growth
  9. Repeat on the middle and the top wires: canes need to go up parallel from now on, 10 cm from each other
Tying in canes: the knots

"Parallel lines"
Pass the twine around the cane, where it faces away from the wire and above the latter, then go around the wire and, from below it, pass a parallel line back to where you started. To remember the sequence, I call this 'parallel lines".

The "cobweb" and  "in the middle"
Make a whole loop around the wire from below to above and then back to below, tightening it up quite hard.  Then pass the twine behind the cane above the wire and pass it around the wire once (or twice depending which side of the wire the cane is on) so that it faces the new cane and you can start again . I call this "in the middle"(of the two canes).


Taping in the loose ends

The final flourish requires one to bend down the top of the canes in equally spaced and high arches, and to tape them in, in one-way succession, to the top wire, for a decorative (as well as functional) finishing effect.
Et voila
Canes tied

Friday 26 September 2014

Pruning cordons

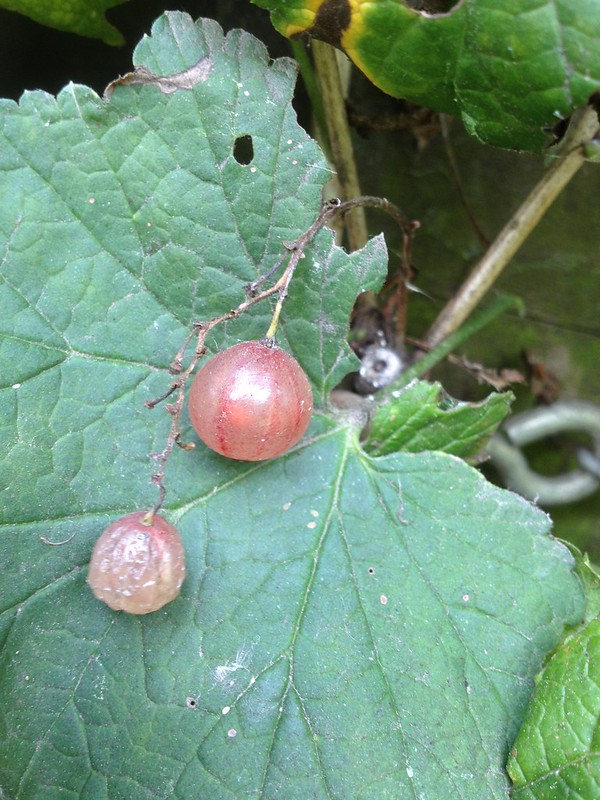
Pink currants (Ribes rubrum cultivars)
Soft fruit shrubs tend put up a lot of growth over the summer, and the last of summer pruning needed doing to keep the trained forms in check and tidy, so I was asked to start working on currants and gooseberries, cutting new growth back to 1-3 buds.
Currants before pruning

Against our toolshed, were some currants (Ribes rubrum cultivars), including pink ones, which I had never come across. Online suppliers I researched report them to be sweeter than redcurrants, but also having high pectin levels, which makes them ideal for preserve-making. Essentially, though, they have decorative value as a novelty. 'Gloire de Sablon' seems to be the only cultivar available to the general public in the UK but the one I pruned was called 'Champagne'.
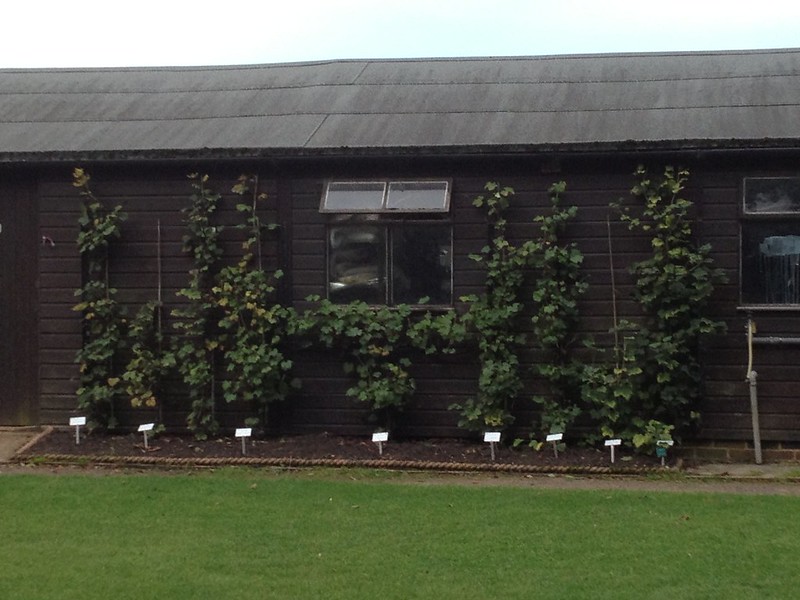
Currants against the tool shed,
after pruning
More learning, however, I got from the gooseberries, which came with an interesting story.

In fact, the collection at Wisley was donated by the Cheshire Gooseberry Society, which was one of the earliest to be set up in the mid-eighteen century, as I learned just this week from a booklet I was reading, called The Cottage Garden.

Horticultural societies were popular at the time, generally the preserve of men, dedicated amateurs from the working classes that started benefiting from wider availability and dropping prices of plant material, and  encouraged as a means of moral improvement. Gooseberry took centre stage, as they were a very popular dessert fruit, both fresh and preserved, and easily grown in England.

Dead serious business it was, but if one wanted to take a modern humourous view of the story of the Gooseberry Societies and their ways, they could not put it better than an article in The Indipendent (which made me giggle):
"So popular was the meadow-green berry in Georgian and Victorian times that gooseberry clubs sprang up across northern England – at one time there were 120 – where growers (mostly men) competed to grow the biggest fruits. As men well know, size is everything, so bushes were pruned almost out of existence to allow just a handful of fruits to be coaxed to supersize proportions."
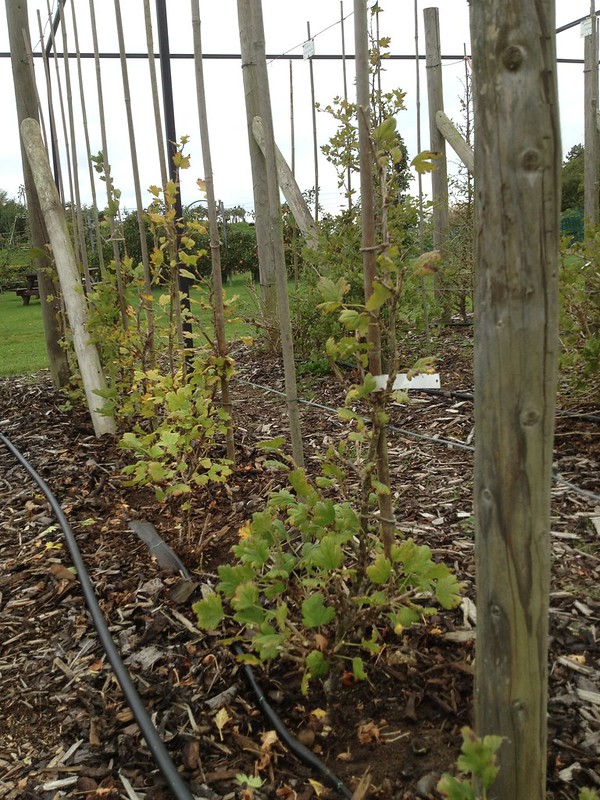
But, according to tradition and in the spirit of the donors,  the gooseberry collection continues to be grown here for their size for display purposes: tied to bamboo canes on a post and wire system, and carefully pruned as cordons. The base of the main stem is kept clear for 15 cm and one stem is grown as leader to reach to the top wire. Sideshoots, however, are grown as fruiting spurs, in a pyramid shape that ensures the plant energy is directed to fruits size, and that the same fruits ripen to perfection as the maximum surface is exposed to sunshine, while at the same time keeping good airflow through the plant.

The cultivars names are really fascinating: from 'Postman' to 'Cook's Eagle' through 'Espera', a testament to the creativity of the Society's members.

Two specimen of each cultivar are planted side by side in the collection, but despite that redundancy, most plants are plagued by American gooseberry mildew (Podosphaera mors-uvae) which causes dieback of shoots, so we were collecting good prunings (some 20 cm long and pencil thickness) for propagation purposes. We also had to sterilise our secateurs every time before starting on a new plant, to avoid spreading the fungus even further.

When the leader of a plant was rather weak, we were encouraged to prune it back to one third of its length in the hope it got stronger, besides pruning the new growth ito 1-3 buds.

I thought pruning these gooseberries required considerable concentration and that the shape of the plant needed careful consideration, to make sure they had the best chance to thrive, but it is possible that with experience I will find it less daunting: I was told by our fruit expert Jim that often people worry too much about pruning.
Wednesday 24 September 2014

Grape stars

When my team leader gave us trainees an introduction to the Fruit Department, he showed us some dessert grapes grown in a small greenhouse by the orchard, remarking that they were high maintenance, requiring: an intensive regime of pruning and trimming, fruit thinning and stripping of the bark from the stems to expose pests before treating in the winter.

Today, one of those grapevines: Vitis vinifera 'Muscat of Alexandria', was the object of extra attentions, as it was of interest to a filming crew coming to the gardens.

Vitis vinifera 'Muscat of Alexandria'
under glass at RHS Garden Wisley
As we were not quite sure why that specific plant was in the limelight, I did a bit of research. An excellent quality variety, although not high-yielding and potentially unreliable , it has been very popular in the Mediterranean from time immemorial, and used as dessert, for raisins and wine-making . Incidentally, I found it really interesting to discover that one of the synonyms for this variety is ‘Zibibbo’, from the Arab for grapes (the grapes of grapes?), which gives the name to a fortified wine from Southern Italy that was the favourite of my grandfather.

Anyway, the reason we worked on the ‘Muscat of Alexandria’ today was the sooty mould growing on the excretions of brown scales (Parthenolecanium corni), one of the glasshouse’s longstanding pests.


Sooty mould
Parthenolecanium corni on Vitis sp

Some of the leaves were completely blackened, which, besides affecting their photosynthesising capacity (and occasionally clogging the pores on the underside), was rather aesthetically unappealing.

So we washed them, bucket of water and sponge in hand. High maintenance stars indeed!

Tuesday 23 September 2014

Fruit picking in the orchard

My first full day in the team and we were all working together fruit picking in preparation for the ‘Wisley Taste of Autumn Festival’ that will take place in mid-October. A number of colleagues from across the Society and numerous volunteers joined us, in addition to the regular Fruit Department volunteers and the fruit pickers hired for the season.

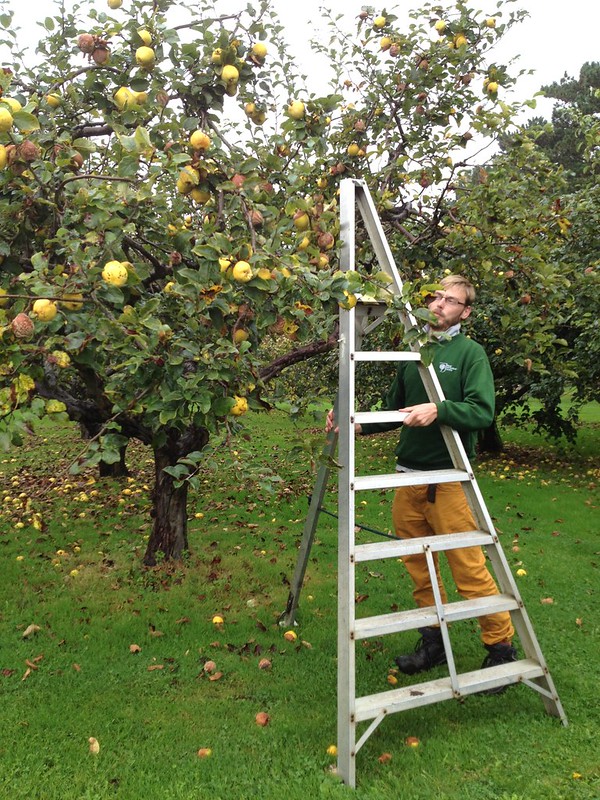
The day could not but start with some training in the use of picking ladders. They have three legs, and come in two types: we have Welsh ones, that are good for picking in the orchard, with a spike at the bottom of one leg to fix them in the ground and that finishing in a triangular point which is easier to place within the tree canopy, and Japanese ones that are more lightweight, have an extendable leg for uneven ground and terminate in a platform.


Welsh style ladder
Japanese style ladder

How to use a ladder safely

1. Check that the ladder is fit for use, without broken or damaged parts, frayed cord etc.
2. Open the ladder, pointing to the centre of the tree that is being picked
3. Ensure the ladder is stable on the ground
4. Always keep three points of contact between the body and the ladder, facing it at all time
5. Never climb to the last two steps (usually labelled)
6. Do not overextend to the sides, keep within arm reach from the centre
7. Never leave the ladder open when finished using it
8. Place out of the way between trees, with the steps up (in case of frost in winter)

We picked: apples (there are 450 cultivars only of dessert apples, then there's the 'cookers'), pears and quinces.

It was my first time picking professionally, and realised that the techniques to pick each type of fruit vary.
Apples tend to come off the plant rather easily, with a gentle twist in your cupped hand, while lifting towards the plant (not pulling away from it). However, much depends on the cultivar, and the shape of the stalk. One has to be careful, as sometimes short-stalked apples may be very close to next year’s fruiting buds, damaging which would of course compromise next year’s floriferousness and size of crop.

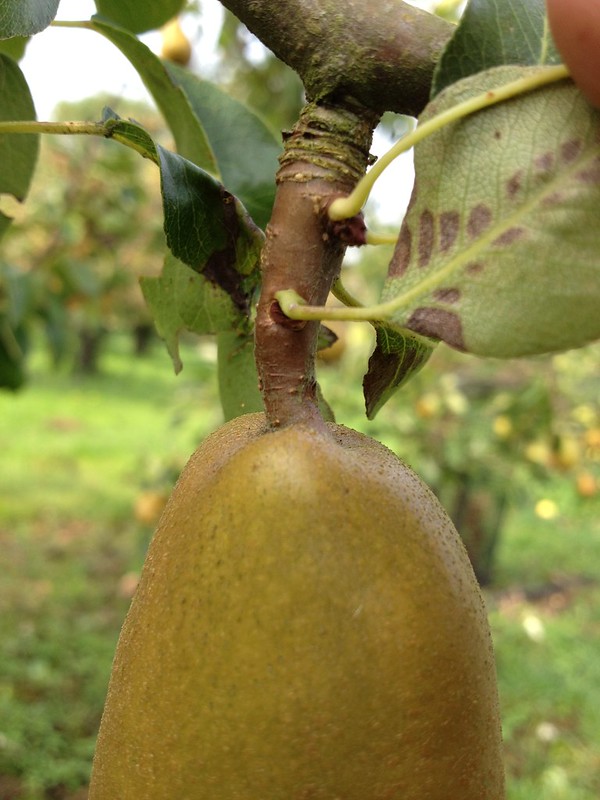
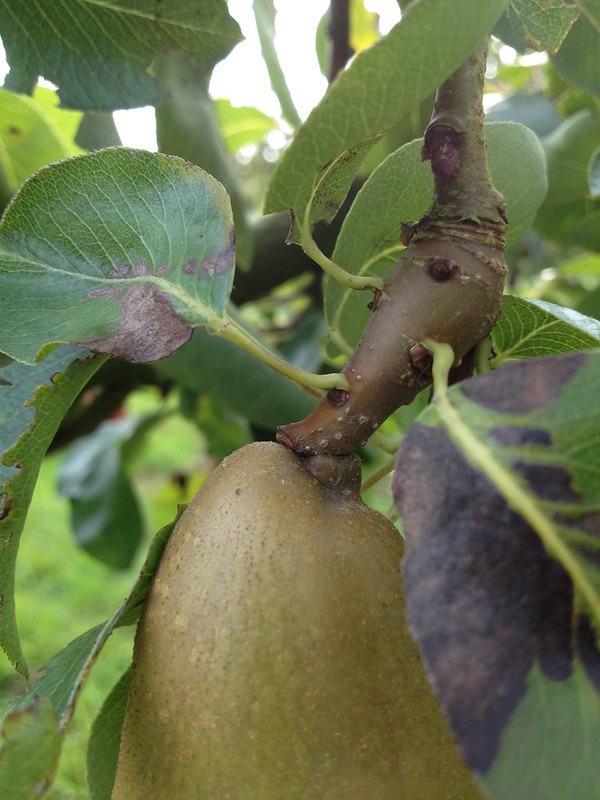
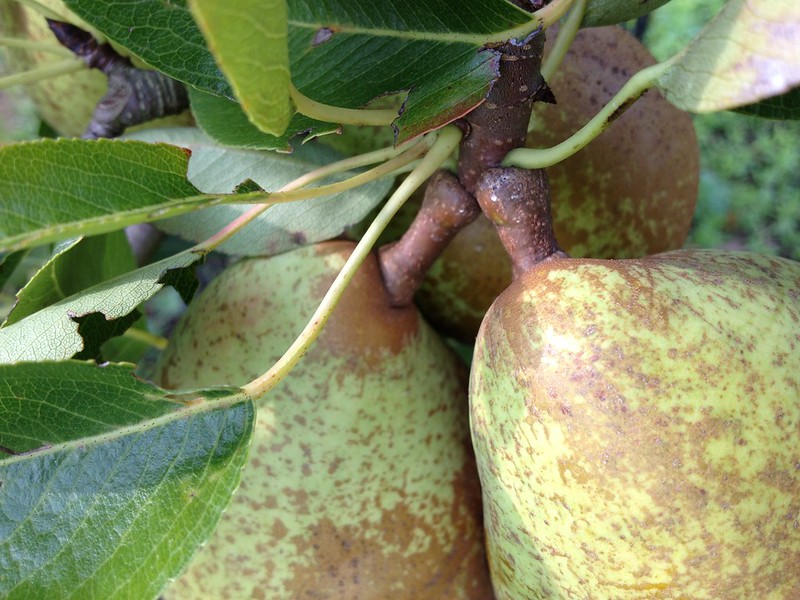
Pears seem to be trickier to remove as they hang on tighter to the tree, and I found it is useful to keep your index finger on the peduncle while twisting them gently clockwise, then anticlockwise. Sometimes, however, depending again on the pear cultivar and how the individual fruit developed, it is very difficult to find where the peduncle starts and the stem ends, and the abscission layer is not clearly marked; that is accentuated by the fact that we tend to pick fruit slightly unripe (so it keeps better), when the abscission layer may not yet be completely formed.

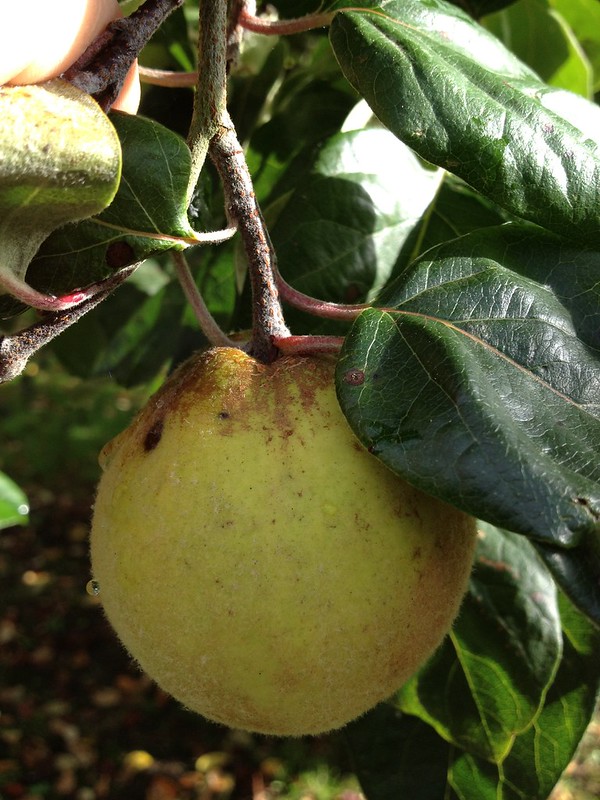
Ideally, one would always detach the fruit at the abscission layer, because that is where the plant naturally heals the wound faster and more effectively. But, for example in the case of quince, their abscission layer is right at the bottom of the peduncle next to the fruit, and, if picked unripe, they require secateurs to remove the fruit without damaging the stem. 
 
 
Apples: stalks: barely visible abscission layer (left), short stalk close to flowering bud (right)


Pears: no abscission layer visible, awkwardly positioned stalk, clearly marked stalk


Quince: stalk and abscission layer at its base

Leaving frayed edges, in fact, is unadvisable as they do not heal quickly on the plant, encouraging pest and disease attack, which is especially risky at this time of the year when the air is rife with fungal spore. Also, frayed edge may cause tears and damage in the fruit when it’s being stored. If the stalk came off altogether, in the case of pears and apples, that would also be a potential ingress for pest and diseases, making the fruit unsuitable for storage.

It is also rather important not to bruise fruit when picking as that would impair quality, and quality is of primary importance, as we sell the fruit both here in the garden and at events, beside supplying the restaurants on site and some other venues.

Quality control is of primary importance in the case of the fruit that we sell, so we have a system by which we organise our pickings:

  • Show layer: the fruits that are more representative of the cultivar: unblemished and of good size, they are used in displays
  • Fruit for selling: undamaged, of good appearance and with minor blemishes only (for example small scars from the apple sawfly larvae, or small scab patches). If the fruit is for cooking, appearance is considered less important than for dessert fruit
  • Fruit for juice/cider: blemished but not bruised and smaller sized fruits
  • Bruised, damaged and rotting fruit is raked into the centre of the orchard corridors where they are flailed with a tractor, so that they decompose faster, returning nutrients to the soil. 


Monday 22 September 2014

Lifting safely

I have been here at Wisley for over a week now, but this is the week when we start doing some real work in our departments after a few days of induction. It started for me with a full day's training on safe lifting, which I had never attended before.

Do we have to lift a weight? Can we use some manual handling aid? And, if it is repetitive lifting, can we mechanise the process?

Those were some of the main questions raised by the trainer, as he explained that the best he could do for us was to make us aware of the risks of lifting and the best ways to minimise them, the most part had to be done by us in changing our ways and, together with our employers, the workplace processes whenever we found that they were not suitable.

My main takeway was that nobody gains anything by doing more effort than is needed: work-related illnesses cost in the millions of lost days every year to the UK economy (there is quite a lot of information about this on the HSE website), and to the individuals their health, of course.

I was aware of the standard rules for lifting: bend your knees, keep your back straight. But I had not quite realised - being quite stockily built myself, and enjoying hard physical work - that there are marked differences in bone structure that make it safer for men to lift heavier weights than women and that it is silly to ignore, for example. In fact, health risks for women increase, more than the UK Health and Safety laws consider advisable, from lifting anything above 15kg. Also, I had not quite realised than the position of the weight makes lifting more or less risky: for example weights picked from the ground  or lifted above shoulder height pose a greater risk than those picked from waist height.

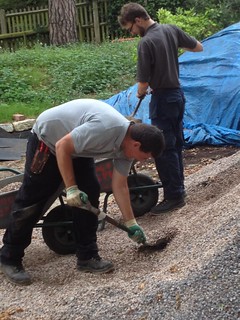
A practical exercise also made me consider the difference that using a correct tool makes in minimising the lifting effort. We were asked to shovel some soil. I offered to try, and found the tool was so short I had to bend quite low, almost to the ground, which was hard work. Then, we were made to try a long-handled shovel, customary elsewhere in Europe. The leverage of the long handle made it light work indeed! The legend goes that English short-handled shovels originate from when miners were living the mines (where they were digging while kneeling) and carried their tools with them to other professions.


It may not be the whole story, but it certainly highlights the power of tradition in the practices we use, and the difficulty in introducing new ways of doing things where practices are established.

I will be certainly more careful now in considering my personal capacity to carry out a task and the possible consequences of excessive lifting, planning ahead to minimize the stress on my back (twisting it when handling weight is particularly damaging): hernias felt like a rather real risk after we got graphical explanation of bones and muscles in good detail.

Here's what HSE suggest about manual handling:
  • Remove obstructions from the route.
  • For a long lift, plan to rest the load midway on a table or bench to change grip.
  • Keep the load close to the waist. The load should be kept close to the body for as long as possible while lifting.
  • Keep the heaviest side of the load next to the body.
  • Adopt a stable position and make sure your feet are apart, with one leg slightly forward to maintain balance
And I will be remembering to drink more to avoid reduced muscle performance from dehydration.